Your Shopping Bag is Empty

Lingerie
Find Your Perfect Fit
Our expert bra-fitting guide will help you find the perfect fit from the comfort of your own home.
Step 1: Lift your arms
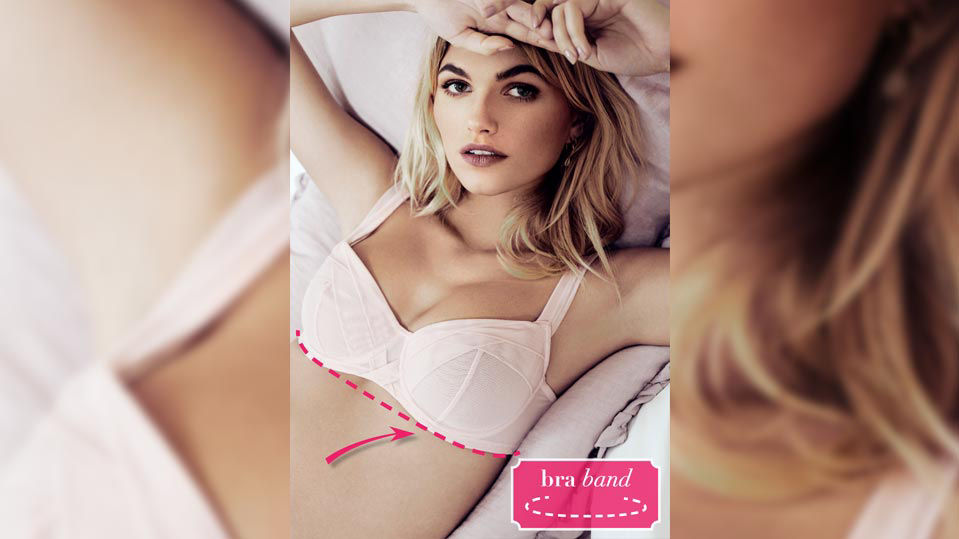
Ensure that the bra band is staying in place, if it moves, you may need to go down a size in the band. This part of the bra provides the majority of the support so it’s important that it sits and fits firmly.
Step 2: Examine the level of the band
A bra band that fits properly should remain at an even level around your ribcage. If the band is raised upwards at the back, then it may be too big. You should only be able to slide one finger underneath the band.
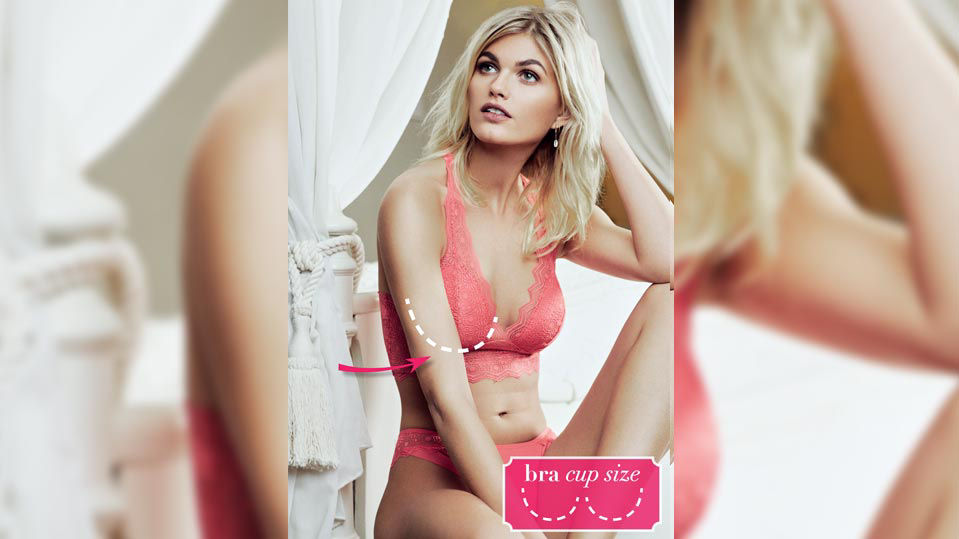
Step 3: Check the cup
The cups of the bra should go right around the contour of the breast, sitting flat against your ribs without digging into the breast tissue. The whole breast should fit within the cup without bulging out over the front or sides – if this happens, the cup may be too small. On the other hand, if the cup puckers and looks baggy, it is probably too big so a smaller cup would be more suitable.

Step 4: The centre front
The centre front of the bra sits between the breasts (also called the bra bridge) and this should sit flat against the chest bone. If there is a gap between the bra bridge and your rib cage, it might mean that the cup size is too small.
Step 5: The straps
Straps that dig in to your shoulders or slide off them altogether could mean that your bra is showing signs of wear. However, examine if you can adjust the straps to provide a better fit.
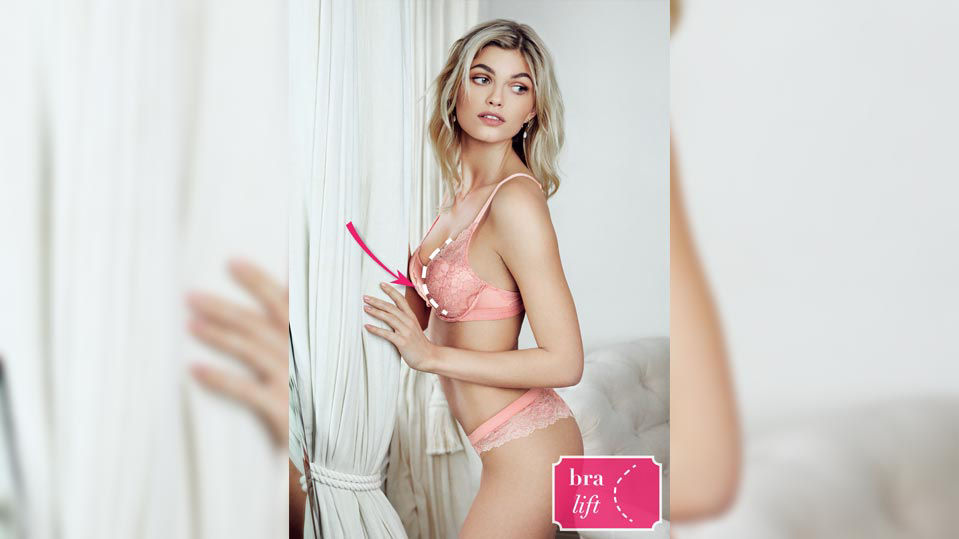
Step 6: The lift
Try looking at yourself in the mirror sideways to check that the most projected part of your breast is positioned midway between your shoulder and elbow. If it doesn’t, you may need a more supportive and better fitting bra.
Step 7: Discover a new piece of beautifully designed and truly comfortable lingerie
If your bra has become uncomfortable to wear, it might be an indicator that it no longer fits you as well as it used to and might be time to replace it.
Remember that your size can vary over time so it’s important to examine the fit of your bra every few months.
Calculate Your Measurement
There are two key measurements that will guide you in calculating your measurement – the band size and the cup size. Take the following steps to calculate yours:
Step 1: Determine your band size
While braless or wearing a non-padded bra, use a measuring tape to measure around your torso directly under your bust, where the bra band would sit. The tape should be level and very snug. Round this measurement off to the nearest whole number. If the number is even, add four inches. If it’s odd, add five.
Your band size is the sum of this calculation. (For example, if you measured 32 inches, your band size is 36. If you measured 33 inches, your band size is 38).
Step 2: Take your cup measurement
Wrap the measuring tape somewhat loosely around the fullest part of your chest (at nipple level). Round to the nearest whole number.
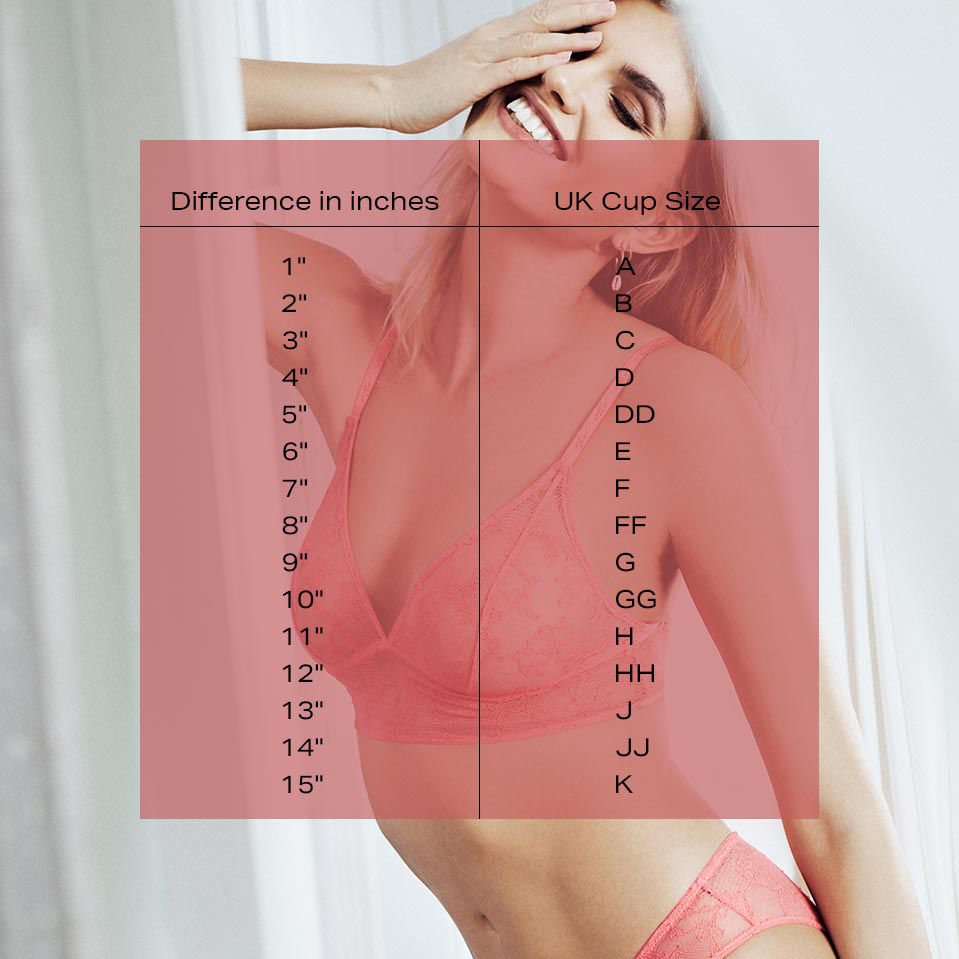
Step 3: Calculate your bra size
Finally, subtract your band size (Step 1) from your bust measurement (Step 2) and refer to the cup size chart below.
For example, 37 inches (bust) – 34 inches (band) = 3 inches. This means your size is 34C.
Remember, your bra should fit perfectly when secured on the outermost hook. As the bra loosens over time, you can begin to move towards the tightest hook.